


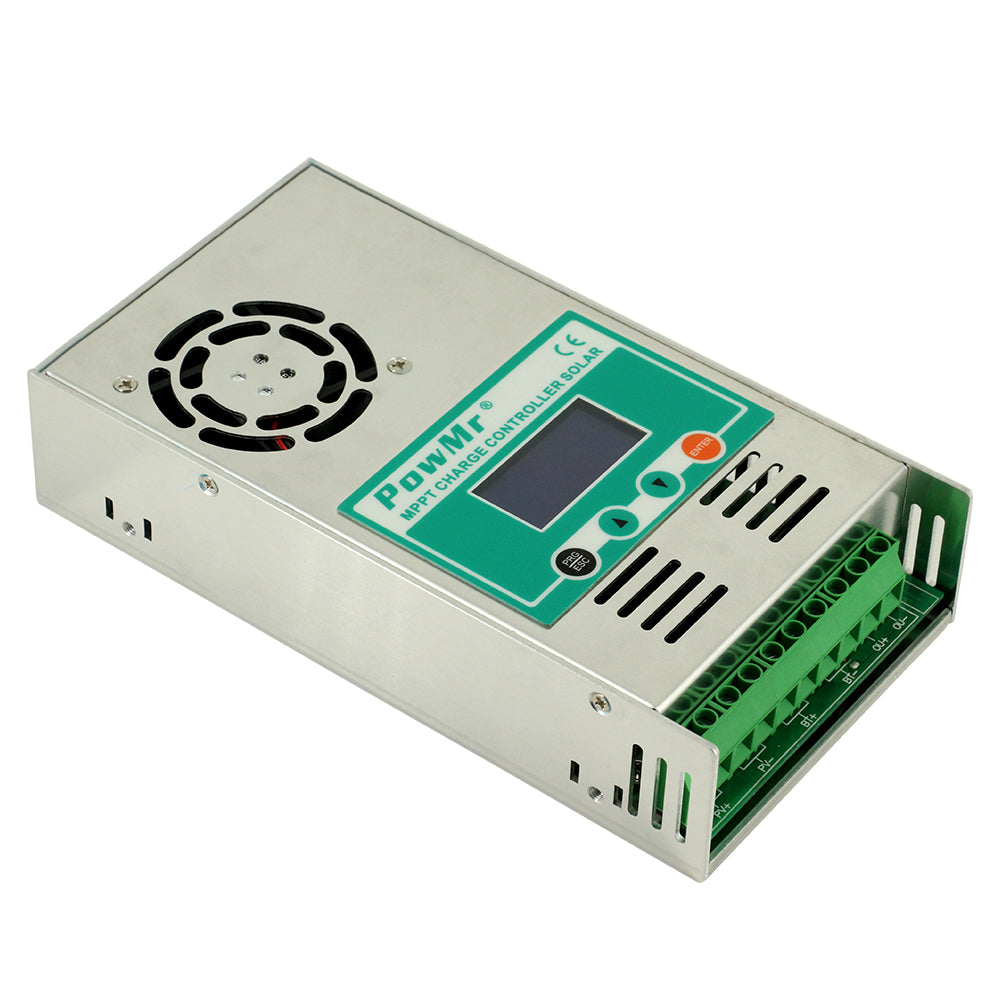
Temank Indoor 60A Solar Charge Controller Features
- Brand: Temank
- Application: Indoor
- 60A MPPT solar charge controller
- MPPT technology
- Built-in DSP controller with high performance
- Automatic battery voltage detection for 12V/24V/36V/48V
- 3-stage charging optimizes battery performance
- Overcharge protection, Input PV polarity reverse protection, Output limited current
- protection, Over-temperature protection
- Suitable for battery types such as sealed lead acid, vented gel and lithium battery, etc
- Easy to be mounted
Warning and Caution
Be aware that only qualified professionals could install these controllers. Please read all manuals before installing them.
1) Keep controller away from water. Don’t use wet towel to wipe controller;2) Keep controller in an environmental temperature from -22℃~+55℃. Avoid direct sunlight;
3) Keep good heat dissipation;
4) Use the pure copper wires and connect all polarity correctly;
5) The load output is only for DC load less 5A current;
6) Please don’t set any parameters if you are not professional since the controller can work fine in default condition except lithium battery.
PV Module Requirement
|
Models: HHJ-30A, HHJ-40A, HHJ-50A, HHJ-60A |
HHJ-30A |
HHJ-40A |
HHJ-50A |
HHJ-60A |
|
|
Maximum PV Array Power |
For 12V Battery |
400W |
480W |
600W |
720W |
|
For 24V Battery |
720W |
960W |
1200W |
1440W |
|
|
For 36V Battery |
1000W |
1400W |
1800W |
2100W |
|
|
For 48V Battery |
1200W |
1700W |
2200W |
2800W |
|
|
PV Array Open Circuit Voltage (Voc) @Operating Voltage |
For 12V Battery |
DC20V~DC80V |
|||
|
For 24V Battery |
DC37V~DC105V |
||||
|
For 36V Battery |
DC50V~DC160V |
||||
|
For 48V Battery |
DC72V~DC160V |
||||
Notes: Voc is 1.5 or 2 times than battery voltage, then it’s best efficiency. Please choose the PV modules with right Voc.
Air Circuit Breaker and Wires Requirement
|
Models |
HHJ-30A |
HHJ-40A |
HHJ-50A |
HHJ-60A |
|
Copper wires |
6mm² |
6mm² |
6mm²x2PCS |
6mm²x2PCS |
|
Air circuit breakers |
63A |
63A |
63A |
100A |
Reminder:
For S3-30A and S3-40A, you can connect one wire to one PV+ and another wire to one PV-
For S3-50A and S3-60A, it’s better to connect two wires to two PV+ and another two wires to two PV-
For BAT+ and BAT-, it’s same way to connect wires
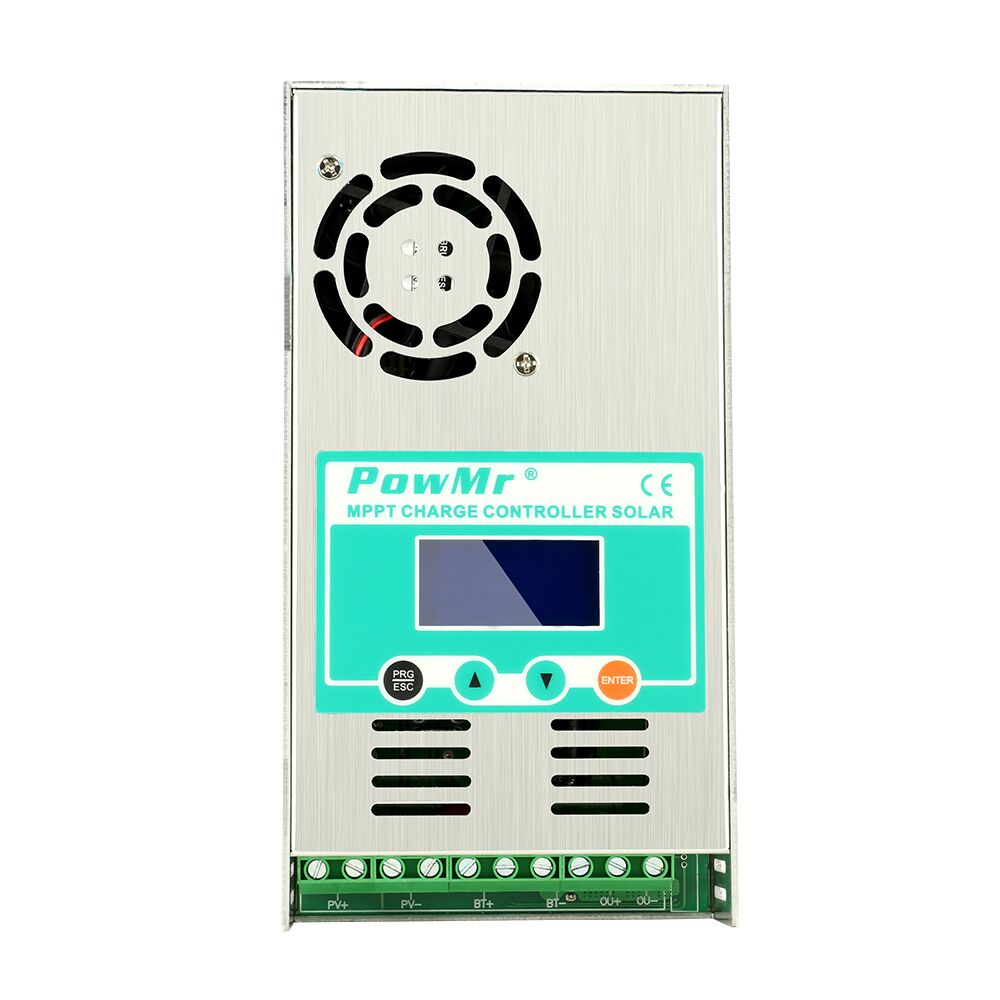
Installation steps
- The battery voltage should be more than 12V, then the controller can boot up. Install air circuit breaker between controller and batteries. Turn off the circuit breaker, then connect batteries to controller with correct polarity;
- Install air circuit breaker between controller and PV modules. Turn off the circuit breaker, and ensure the PV polarity correct, then connect wires between PV modules and controller;
- Turn on the air circuit breaker between controller and batteries;
- Turn on the air circuit breaker between controller and PV modules;
- The controller goes into the self-test mode. Its LCD displays the parameters if all is correct. And RUN lamp (under the fan inside of casing) will flash every one second. If the controller is no response, please read full manual again for reinstalling or contact us for help

LCD Display
|
Item |
Description |
|
1 |
PV voltage / Output power |
|
2 |
Battery voltage / Charging current |
|
3 |
Working mode / Temperature |
|
4 |
Protection mode |
Working mode
|
3.0 |
Night mode, no charging |
|
4.0 |
MPPT mode |
|
7.0 |
Absorption mode |
|
8.0 |
Floating mode |
Troubleshooting
|
Code |
Description |
How to solve |
|
18 |
Input PV voltage is low |
Increase the PV voltage |
|
60 |
Over-temperature protection |
Fan will work and temperature reduction automatically |
|
63 |
Battery voltage is high |
Battery high voltage protection and wait for recovery |
|
65 |
Battery voltage is low |
Battery over-discharge and wait for recovery |
|
71 |
Input PV voltage is high |
Decrease the PV voltage |
|
73 |
Over-charging current |
Decrease the PV power |
Basic Parameter
|
Models |
S3-30A |
S3-40A |
S3-50A |
S3-60A |
|
Charging mode |
3-stage: constant current(MPPT), constant voltage, floating |
|||
|
Battery voltage automatic recognition: 12V Battery |
DC9V~DC15V |
|||
|
Battery voltage automatic recognition: 24V Battery |
DC18V~DC29V |
|||
|
Battery voltage automatic recognition: 36V Battery |
DC30V~DC39V |
|||
|
Battery voltage automatic recognition: 48V Battery |
DC40V~DC60V |
|||
|
Overcharging protection voltage |
15V |
30V |
45V |
60V |
|
Limited current protection |
31A |
42A |
51A |
61A |
|
Max efficiency |
≥98.1% |
|||
|
PV utilization |
≥99% |
|||
|
Protection function |
||||
|
Temperature protection |
75℃ |
|||
|
Fan-on temperature |
>45℃ |
|||
|
Fan-off temperature |
<40℃ |
|||
|
Properties |
||||
|
Size (mm) |
214x115x50 |
|||
|
Net weight(Kg) |
1.1 |
|||
|
Gross weight(Kg) |
1.2 |
|||
|
Electromagnetic compatibility |
Accord to EN61000, EN55022, EN55024 |
|||
|
Enclosure |
IP21 |
|||
|
Environmental temperature |
-20℃ ~ +55℃ |
|||
|
Storage temperature |
-40℃ ~ +75℃ |
|||
Manual Setting
Reminder: The controller will work fine under default setting except lithium battery.
Caution! All steps must be carried out when the PV modules are disconnected to controller.
Step 1: D00
Press the button PRG, then LCD displays D00. This is setting for load working time (Default is 24-hour). Press ENT until numbers flash, then press UP/DOWN to set up time that you want, long-press ENT to confirm it. This output voltage is same as battery. The load is only for small DC loads less 5A current. If no load, just leave it.
Step 2: D01
Press the button UP, LCD shows 13.8. This is default value of floating charging. Press ENT until numbers flash, then press UP/DOWN to set up voltage that you want, long-press ENT to confirm it.
Caution! This value is for one 12V battery. If there are many batteries in series, the controller will multiply them in proportion automatically and the LCD only displays the voltage of one battery (For example, if your battery is 4x12V, and if you set the voltage at 14.1, the charge voltage will be 4x14.1 automatically, but the LCD only displays 14.1).
Step 3: D02
Continue to press the button UP, LCD shows 14.5. This is highest absorption charging voltage for battery. Press ENT until numbers flash, then press UP/DOWN to set up voltage that you want, long-press ENT to confirm it.
Caution! This value is for one 12V battery. If there are many batteries in series, the controller will multiply them in proportion automatically and the LCD only displays the voltage of one battery.
Step 4: D03
Continue to press the button UP, LCD shows 10.0. This is protection value of battery discharge. Press ENT until numbers flash, then press UP/DOWN to set up voltage that you want, long-press ENT to confirm it. It means it’s protected when 12V battery is less 10.0V and there is no output power from OU+ and OU-.
Step 5: D04
Continue to press the button UP, LCD shows 00. 00 is default for acid batteries.
If it’s for lithium battery, please press ENT until numbers flash, then press UP/DOWN to choose 01, long-press ENT to confirm it. Step 2 (D01) is no useful when you choose 01 for lithium battery. And the voltage set in step 3 (D02) will be highest charging voltage for lithium battery. Press ESC to exit the setting menu.
Reminder: When you set up all steps, please disconnect battery. And reconnect controller to see if all setting is successful. When all setting is ok, then connect PV modules to controller.
Batteries charge voltage reference
|
Battery Type |
Absorption Voltage ( Constant voltage ) |
Floating Voltage |
||||
|
|
12V |
24V |
48V |
12V |
24V |
48V |
|
Vented |
14.2V |
28.6V |
57.2V |
13.2V |
26.4V |
52.80V |
|
Sealed |
14.4V |
28.8V |
57.6V |
13.8V |
27.6V |
55.2V |
|
Gel |
14.4 V |
28.8V |
57.6V |
13.8V |
27.6V |
55.2V |
|
NiCd |
14.2V |
28.6V |
57.2V |
14.0V |
28.0V |
56.0V |
|
Lithium or others |
Defined by users |
|||||
Temank 60A MPPT Solar Charge Controlle Dimension

Notes: Please use our screws only since it may damage the internal PCB if using other screws. Please use proper torque to push the screws into casing since it may damage the internal PCB by strong torque.
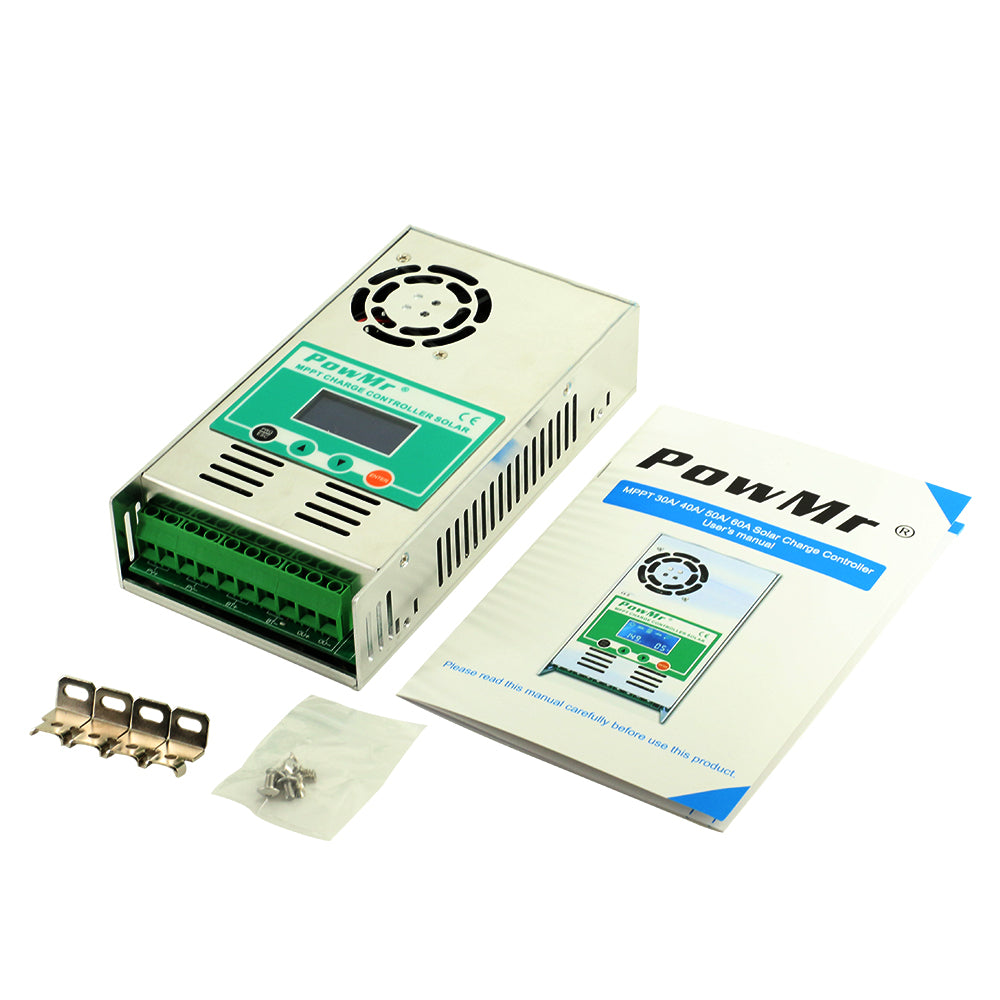
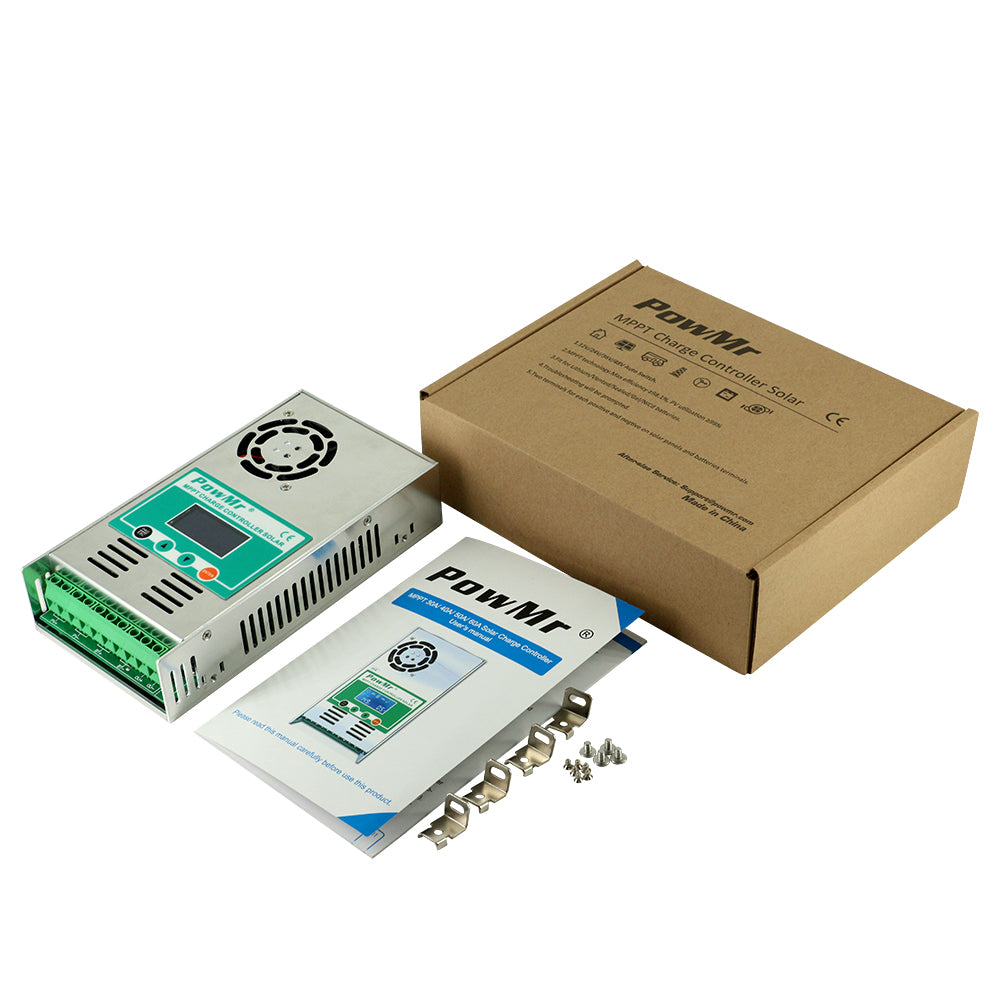
Temank Solar Charge Controller Package Include:
- Indoor Solar Charge Controller * 1
- English manual * 1
- Corner connections * 4
- Screws for controller casing * 4